Introduction
Spring公式が提供するサンプルプロジェクトをインポートし、
最小限の構成におけるwebプロジェクトの動作を確�認します
インポート手順
- Eclipseの上部メニュー File > New > Other をクリックし、
Select a wizard画面からSpring Boot > Import Spring Getting Started Content を選択し、Next

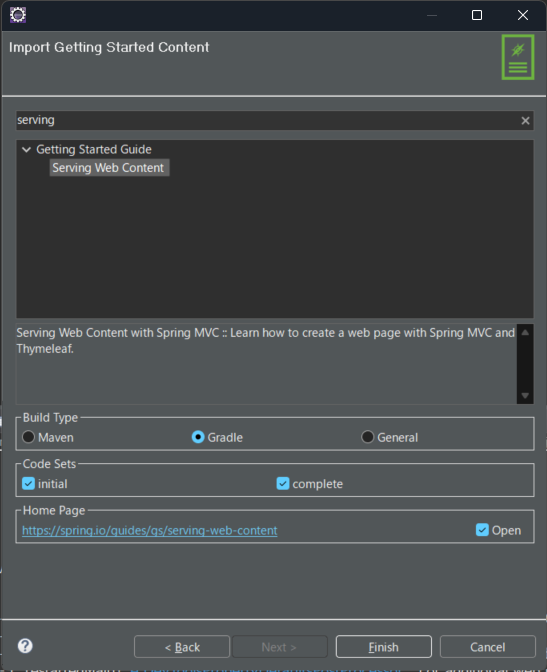
- 次の画面ではインポート対象のプロジェクト名で検索し、該当プロジェクトをクリックして下さい
また、以下の項目が画面と一致していることを確認して下さい
| 項目名 | 値 |
|---|---|
| Build Type | Gradle |
| Code Sets | ✅️Initial, ✅️Complete |
| Home Page | ✅️Open |
確認できたら Finish をクリックし、しばらく待ちます
- プロジェクトエクスプローラに以下2つのプロジェクトがインポートされている事を確認してください
![]()
進め方
インポート2つのプロジェクトは以下の��ように違いがあります。
-
gs-[プロジェクト名]-complete
特に編集等を加えなくても実行でき、動作するプロジェクト (例外あり)
プロジェクト起動後はControllerのMappingURLを確認後ブラウザ等からリクエストを送り、動作確認してください -
gs-[プロジェクト名]-initial
↑のcompleteを参考にして足りない箇所を補完して下さい
最終的にcompleteと同じ様に動作することを確認します
1. serving web content
2. validating form input
3. accessing data mysql
info
本プロジェクトではデータベースを扱います
必要なデータベース及びユーザは以下のクエリを使用して下さい
create database db_example;
create user 'springuser'@'%' identified by 'ThePassword';
grant all on db_example.* to 'springuser'@'%';
また、completeのコードをそのまま記述しても動かないので、以下を参考にして下さい
MainController.java
@PostMapping(path="/add") // Map ONLY POST Requests
public @ResponseBody String addNewUser (@RequestParam("name") String name
        , @RequestParam("email") String email) {
    // @ResponseBody means the returned String is the response, not a view name
    // @RequestParam means it is a parameter from the GET or POST request

    User n = new User();
    n.setName(name);
    n.setEmail(email);
    userRepository.save(n);
    return "Saved";
}
application.properties
spring.jpa.hibernate.ddl-auto=update
spring.datasource.url=jdbc:mysql://${MYSQL_HOST:localhost}:3306/db_example
spring.datasource.username=springuser
spring.datasource.password=ThePassword
spring.datasource.driver-class-name=com.mysql.cj.jdbc.Driver
build.gradle
// 省略

dependencies {
    implementation 'org.springframework.boot:spring-boot-starter-data-jpa'
    implementation 'org.springframework.boot:spring-boot-starter-web'
    testImplementation 'org.springframework.boot:spring-boot-starter-test'
    runtimeOnly 'com.mysql:mysql-connector-j'
}

// 省略
注意事項
caution
実行時に ClassNotFoundException が出る場合
JDBCがロードされていないというエラー内容です
build.gradleのdependencyブロックに以下を追記し、Refresh Gradle Projectをして下さい
runtimeOnly 'com.mysql:mysql-connector-j'